Beekeeping
Bush Bees Home
Why an Observation Hive?
Pictures of Different Kinds of Observation Hives
Getting an Observation Hive
You Can Build One or Buy One
Glass or Plexiglas
Other Nice Features
Exit
Privacy
Observation Hive Issues
Frame Size
Overall Size
Space Between the Glass
Feeder
Ventilation
Robbing
Disconnecting
Working the Hive
Sample
Click on Thumbnails for bigger pictures
Link to a web site with plans
Someone building an Observation Hive
Books for sale
Speaking
Be a patron on Locals
My YouTube Channel
Donations
Beekeeping Apprentice needed
Beekeeping Equipment
Beekeeping Carts
Beekeeping Things I Did Not Invent
Foundationless Beekeeping
Hardware Cloth Uses in Beekeeping
Hive Box Jig
Horizontal Hive Beekeeping
Lighter Beekeeping Equipment
Miscellaneous Beekeeping Equipment
Narrow Frame Beekeeping
Nucleus Hives
Observation Hives
Top Bar Hive Beekeeping
Top Entrance
Two Queen Hive
Wax Dipping Hives
Beekeeping Information
Beekeeping Acronym Glossary
Beekeeping Basics
Beekeeping Fallacies
Beekeeping Math
Beekeeping Locality
Beekeeping Systems
Beekeeping Terminology
Beginner Beekeepers
Classic Beekeeping Books
Colony Decisions
Contrary Opinions
Differences in Observations on Beekeeping
Experiment in Swarm Control
Feeding Bees
Frequently Asked Beekeeping Questions
Forums, how to get a good response
Harvesting Honey
Health Certificates since 2004
Inspections
Installing Packages
Laying Workers
Lazy Beekeeping
Mites that live on bees
More Than Just Bees
Moving Bees
Organic Beekeeping Meetings
Panacea
Presentations
Realistic Expectations in Beekeeping
Robbing
Smoke
Space Management
Splits
Spring Beekeeping Management
Swarm Control
Ten Commandments of Beekeeping
Timing
Too Many Beekeeping Options?
Unlimited Broodnest
Unnatural Things in Beekeeping
Videos of some of my presentations
Water
Wintering Bees
Bee Pests
CCD
Enemies of Beekeeping
Four Simple Steps to Healthier Bees
Mite Bombs
Natural Cell Size
Nosema
Rationalizations on small cell success
Varroa Treatments
Wax Moths
Why I Use No Treatments of Any Kind
Queens
A Few Good Queens
Feral Bees
Genetic Diversity
Quality of Emergency Queens
Queen Flying Off
Queen Rearing
Queen Spotting
Queens For Sale
Races of Bees
Requeening a hot hive
Whole bee concept
Philosophy
Beekeeping Philosophy
Belief in Beekeeping
The Hardest Thing To Do In Beekeeping
How bees change your life
Learning
Native American Honey Bees
Scientific Studies
Other Links
Beesource Beekeeping Forum
Beesource Beekeeping Home
Beemaster Beekeeping Home Page
Dee Lusby on Small Cell Beekeeping
Bee Unto Others
Dave Cushman
Resistant Bees
Beekeeper Linda
Beekeeping like a girl
Bella Donna, Apitherapist
english, español, deutsche, português, русском, română, polsku, беларускай,
Observation Hives
![]()
Why an observation hive?
I love my observation hives.
I have learned much more from them in a year than many years of keeping bees in a hive. Having one, in addition to your hives, gives you an idea what is happening outside in the other hives. You can see if pollen is coming in, if nectar is coming in, if robbing is happening etc. You can watch them raise a queen. Watch how it acts while she is mating, watch them swarm. You can count days or hours on capping times, post capping times etc. You will get to see waggle dances, "get it off me" dances etc. You get to hear what the bees sound like when they are queenless, when they are being robbed, when the queen is emerging etc. I don't know how I did so long without one. I started building one a couple of times, but never got it done. Now I don't know how I did without it.
Pictures of Different Kinds of Observation Hives
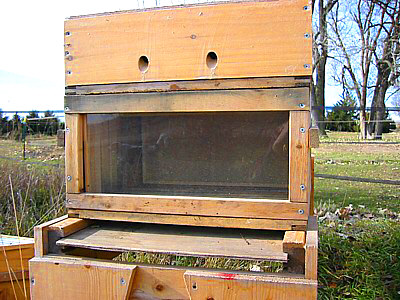
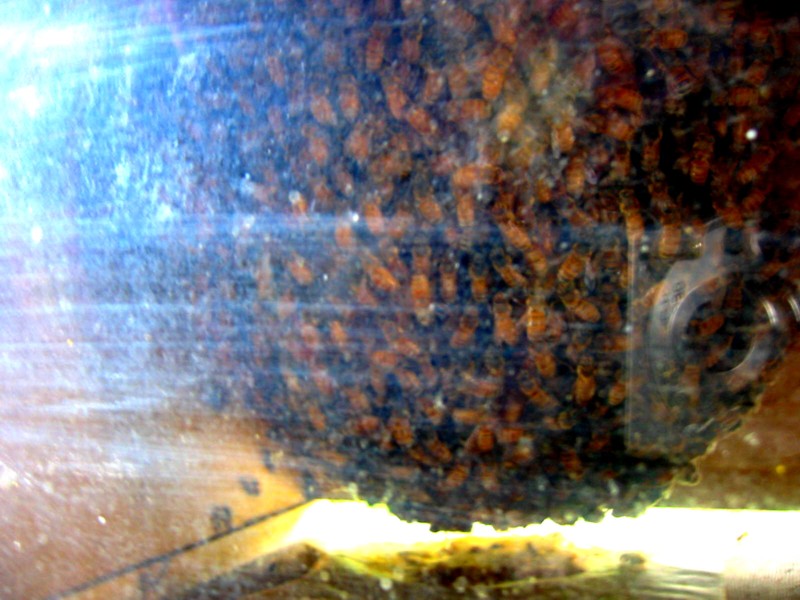
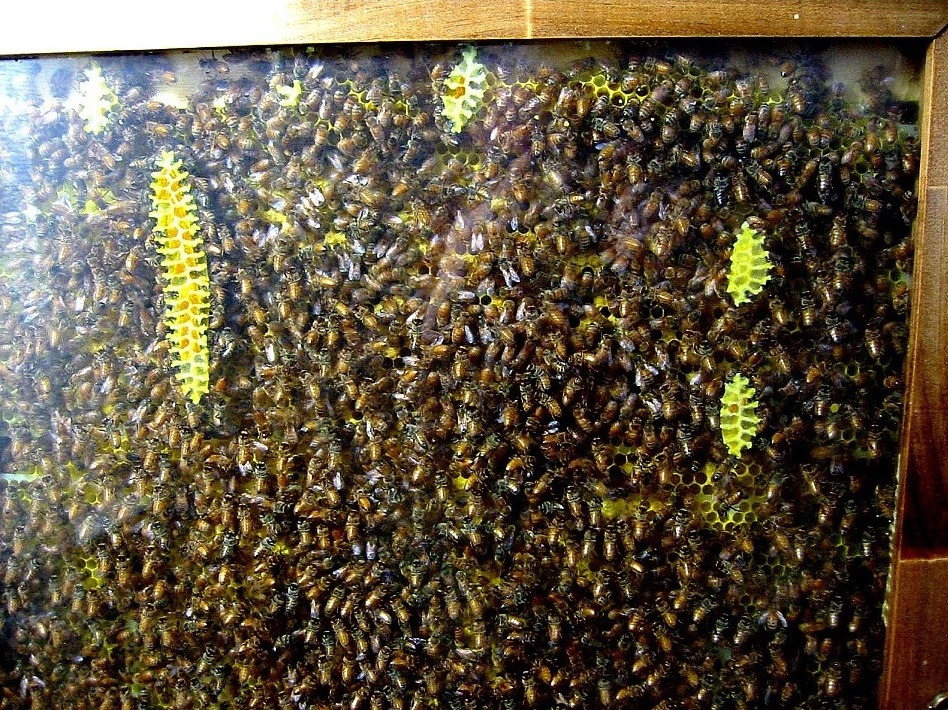
10 frame Langstroth style observation hive. This works very well with foundationless frames. The view is from the face of the combs, not from the end bars. It's not that useful with frames of full sheets of foundation. On the right is a picture of bees in the Langstroth size deep observation box. These are on top bars instead of frames. These were moved into a double wide deep box (standard deep depth and 32 1/2" long) that was kept in the shade. The deep top bar combs eventually all collapsed like a row of dominoes, so I went to medium depth for Langstroth sized top bar hives instead. The observation hive is still nice. I have a board that fits in the inset portion and blocks the sun so it's not a solar wax melter.
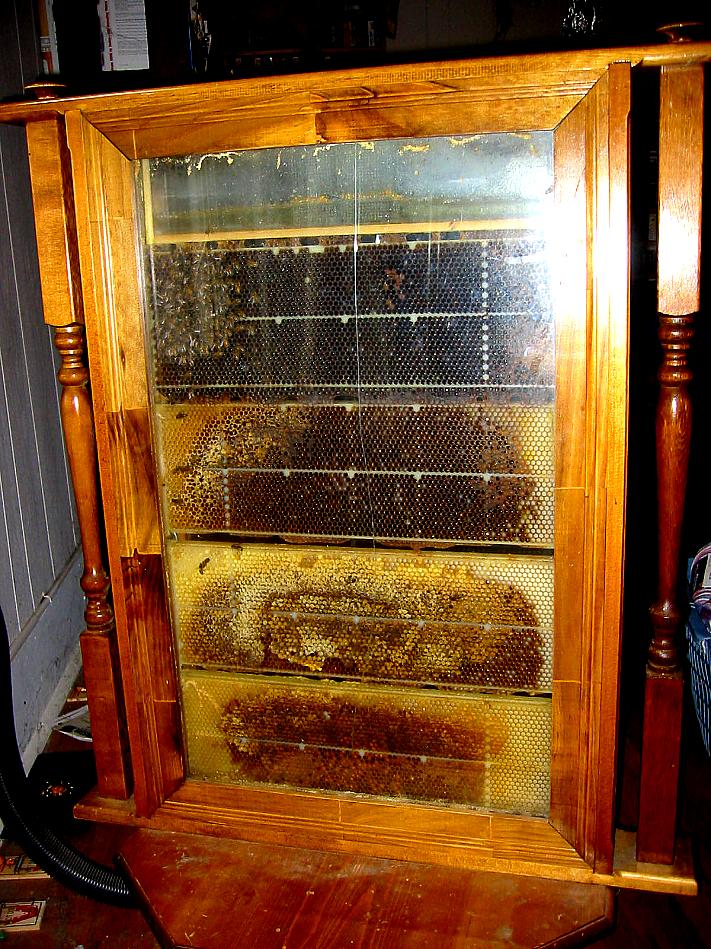
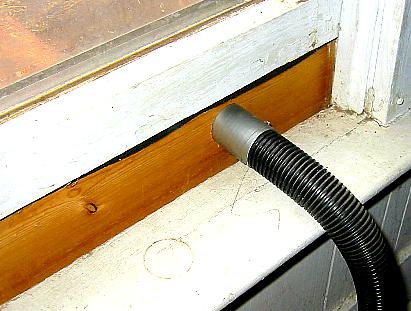
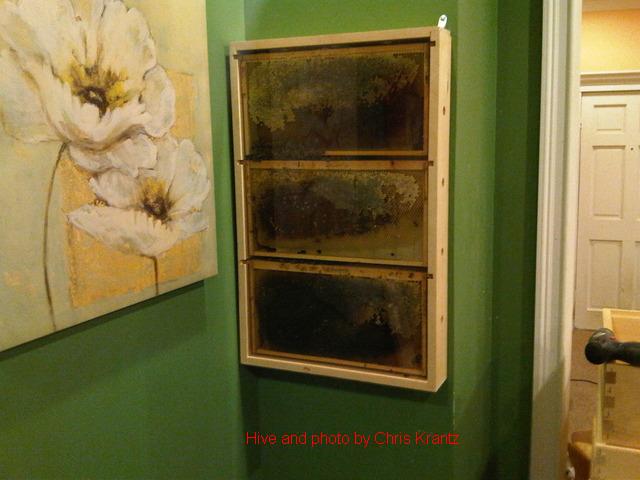
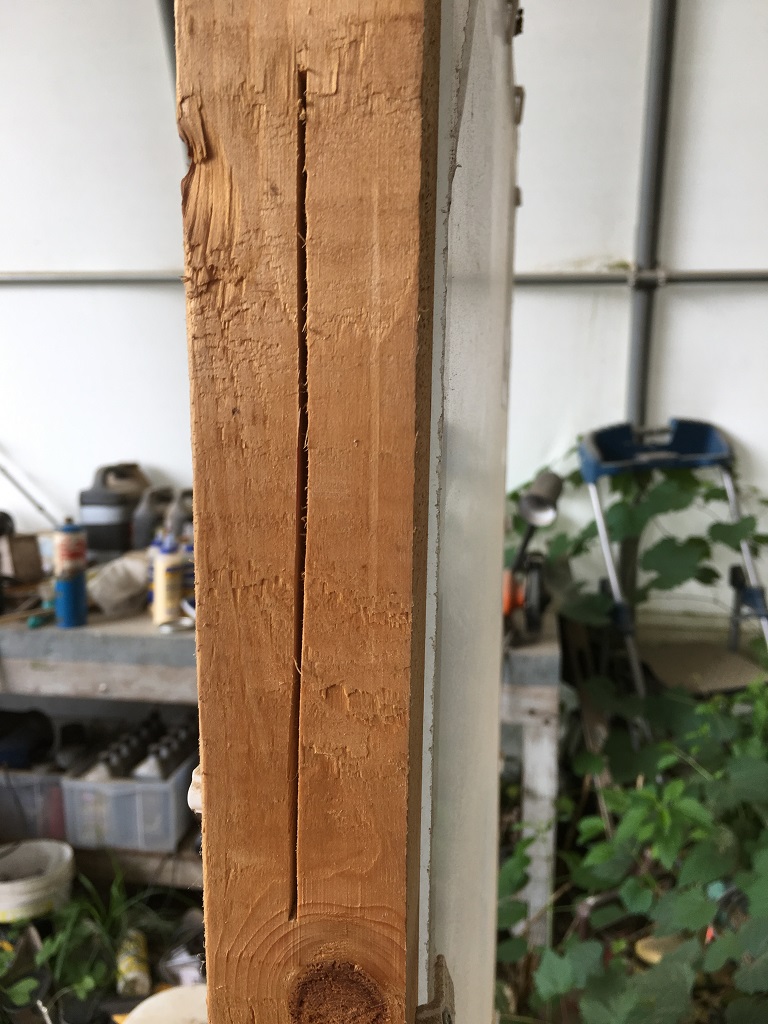
Glass frame feeder for indoor observation hive I built this to fit the odd space left when I reworked the hive to hold four medium frames instead of two deeps and two shallows. Other pictures of the hive, the privacy curtain, the tube going out the window through a one by four insert. The crack in the glass is an insert I put in to correct the beespace. The outside glass is safety glass. The insert is inside, and is regular glass cut to fit. Unfortunately I bumped it with a hive tool when cleaning and put a nick in it. Over time it turned into a crack that slowly went across the entire pane.
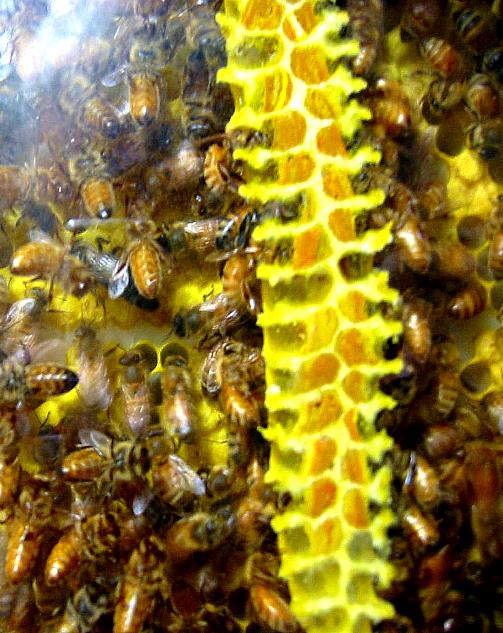
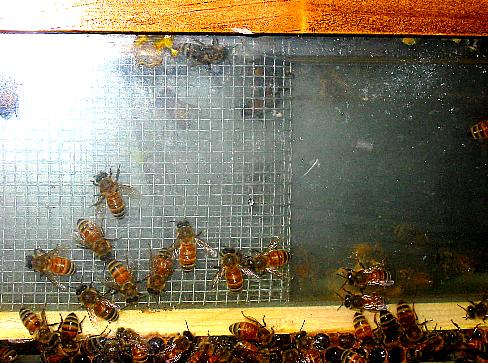
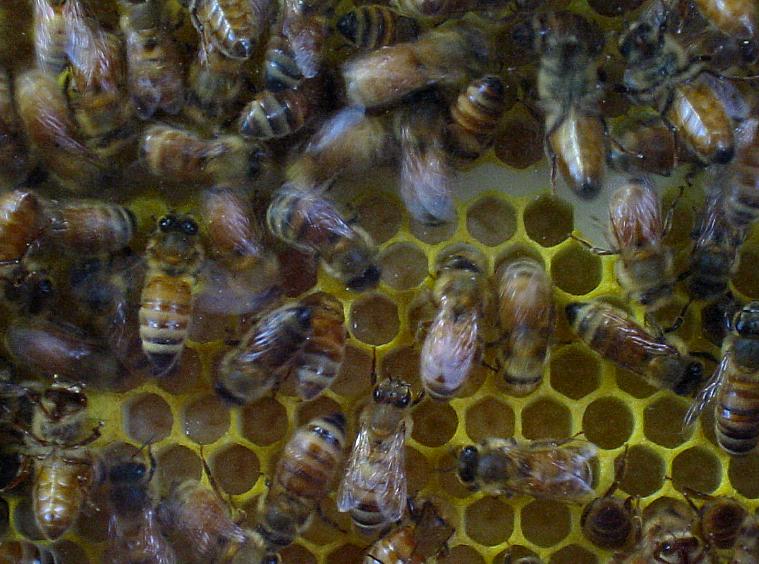
Bees build most cells sloped so that from the bottom of the cell to the mouth is uphill about 15 degrees. But sometimes they build upside down comb on their own, or the beekeeper puts comb in upside down to get the bees to abandon it. I have had the bees refill these upside down cells with honey. But the queen does seem to not like laying in them much. For anyone wanting to see upside down sloped cells you can see them on the bottoms of the smaller burrs on the right hand picture. You can see how the honey does not follow gravity but rather the workings of the bees in the burr in the left picture. See how the honey does not lay flat in the cell and is often straight up and down. If you look at the cells in the picture on the left they are often either completely horizontal or even a bit down sloped.
Brood nest in wax coated PermaComb
Getting an Observation Hive
You Can Build One or Buy One
I will preface this with a disclaimer. ALL of the observation hives I have actually seen or measured or used have been wrong on their beespace. Some are too small. Some are too large. All but the Brushy Mt. ones are not well planned from the point of view of having an observation hive and managing it. This may encourage you to build your own. You may find that is best. You may also find that buying one and then reworking it is easier for you. But here's what I want in an observation hive.
I like one big enough I can keep it all year round one frame deep
That way I can always find the queen, eggs and brood, so let's assume that is the goal.
Glass or Plexiglas
I like them both. If you are buying one, safety glass is pretty durable. That's what my Draper hive is and the grandsons have hit it a few times with toys and it's still in one piece. Plexiglas is less breakable and lighter weight and easier to work with when building your own. Glass is easier to clean. To clean the glass just use a razor blade scraper and scrape it clean. Follow-up with some window cleaner. To clean the Plexiglas you need WD40 or maybe FGMO (Food Grade Mineral Oil). You can get the FGMO at the drugstore as Mineral Oil Laxative. Both solvents have to soak to soften the wax and propolis.
Other Nice Features
In spite of the excess space on my Draper hive, I love it. It has a swivel base so I can flip the hive around to see either side. I finally put a extra piece of glass inside to fix the beespace problem.
Exit
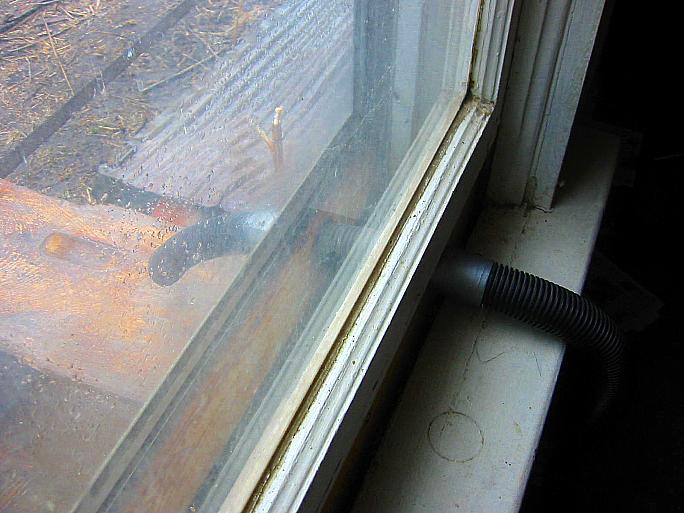
You need an exit for the hive. I use tubing made for a sump pump. It's about 1 ¼". I cut some one by fours to fit the width of my window and storm window and used a hole saw to make 1 ¼" holes in both that line up. Then I worked the hose through and put duct tape on the outside so when the grandsons pull on the hose it won't come back in the house. This is clamped onto the outlet from the hive with an automotive hose clamp. The Brushy Mt. hive required a small block to fill the square hole on the end and I drilled a 1 1/8" hole in that and screwed a 1" (inside diameter) pipe into that for the outlet to clamp the hose to. It helps to have the hive by a window that won't get direct sun (either because it's shaded by trees or whatever) so it won't turn into a solar wax melter.
Privacy
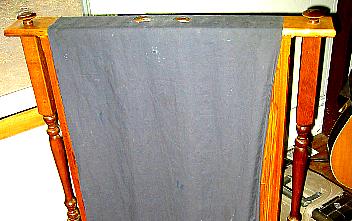
I have the best luck by just buying black cotton broadcloth and folding it double and laying it over the observation hive double again. This can be cut to fit exactly and you now have a curtain that is easy to remove, easy to put on and easy to make. Bees will prefer darkness most of the time.
Observation Hive Issues
Frame Size
Brushy Mt. seems to be the only one who understands that in order to maintain an observation hive, it should be one size frame and that size should match the brood chambers of your other hives. They have stopped offering any but the "Ulster" hive now. They used to offer one that is all deeps (Huber hive) and one that is all mediums (Von Frisch). I reworked the Draper hive to take four mediums and a homemade glass sided feeder to fill in the difference at the top.
Overall Size
I have never had much luck raising bees with the small Tew hive (which it really wasn't designed to do anyway), even though I reworked it extensively (and will talk more about that later). The bees have never thrived in it. It's just too small. I think the minimum size for a sustainable observation hive is three mediums or two deeps, but four mediums or three deeps is better. Since you have to carry it outside to work it (at least if you keep it in your living room as I do) you want it light enough you can move it. I find the four medium frame ones are about as large as I can easily manage. So I would say that is the ideal size. Four mediums or three deeps (depending on what you use for brood in your hives). You can rework them by changing the rests to take different size frames you can make up the odd left over amounts by making feeders or just putting in a top bar to fill the gap with a beespace above and below.
Space Between the Glass
For reasons unknown to me, no one seems to get this right. It's not the end of the world but it is a bit irritating. The Draper has about 2 1/4" between the glass and the bees burr the glass up a lot. The Brushy Mt. hives have 1 1/2" between the glass and when I put in frames of brood from a hive it was too tight a fit and the brood could not emerge and the bees absconded. I reworked the Brushy Mt. hives by adding a screen molding (available at the hardware store) which is 1/4" thick. I put it behind the hinges on the hinge side and behind the door as a stop on the opposite side and added one next to the door just to match the other side. This has worked perfectly and it is my most thriving hive now. 1 3/4" is just the right amount of space between the glass for an observation hive. 1 7/8" is ok.
Feeder
An observation hive is in the house (usually) and therefore you need to be able to feed it without taking it outside. The Brushy Mt. Van Frisch had a screened in feeder station on it where you put a quart jar with holes in the lid to feed it. It works well. The Draper had no feeder so I made a frame feeder with glass sides and put it on top with a hole to fill it on top covered with #7 hardware cloth. I can also dump in some pollen if I want since it will go through the #7 just fine. But I had problems when I dumped it into the syrup, because it would cause the syrup to ferment. I put another hole further to one side so it would miss the hole in the feeder and I can feed pollen there, again with #7 hardware cloth to cover it.
Ventilation
Ventilation seems to be more difficult to get just right for both you and the bees. The long tube going out the window makes it difficult for them to ventilate the hive through the entrance. I reworked the Tew hive several times before I REDUCED the ventilation enough that they could raise any brood at all. I had to increase the ventilation in the Draper hive so the condensation on the glass would go away and the chalk brood would clear up. You need to pay attention to the bees needs. If there is condensation on the glass there is not enough ventilation. If there is chalk brood in the hive, there is not enough. If they are having a lot of trouble raising any brood, there is probably too much.
Robbing
An observation hive is by definition a small hive and is prone to robbing by the stronger hives in the yard. Again the Von Frisch has a piece of Plexiglas that drops into the part where the tube going outside is that reduces the entrance. You flip it over and drop it in and it blocks the exit altogether. The Draper does not and that has been a problem from time to time.
Disconnecting
I've tried a variety of fancy gadgets to disconnect the hive to take it outside and block the incoming bees and the outgoing bees. None have worked that well. What I end up doing is taking three pieces of cloth large enough to cover the tube and three rubber band hair ties and disconnecting the tube and quickly cover the ends with cloth and hair ties. I do just separate them enough to slip in the cloth first. If someone is available to help I have them hold the cloth on one end while I rubber band the other. After the tube going out is blocked and the hookup for the tube on the hive is blocked I go outside and do the tube out there so there won't be a traffic jam inside the tube when I'm trying to connect it back up. Then I haul the hive outside, do my manipulations and bring it back in.
Working the Hive
It seems as soon as you open the observation hive the bees start overflowing out onto the hive. You will need a smoker and a brush to get the door closed again. Try to smoke them back into the hive and then brush as many as you can out of the way of closing the door. Another advantage to the Von Frisch AFTER I put in the extra spacer is that the bees don't get crushed so much in the hinge or the door side because there is a 1/4 gap all the way around. I brush them off once, move the hive a ways, and do it again. Then I take the hive back in the house and put the two tubes against each other and remove the cloth as quickly as I can and reconnect things. If I do this with a minimum amount of time of the tube being open, I almost never have a bee get into the house. If they do they will just try to go out the window and you can catch them with a glass and a piece of paper. Put the glass over the bee and slide the piece of paper under the glass. You now have a bee in the glass. Take it outside and let it go.
Whenever I need to rework the hive or do a thorough cleanup, I just put the frames into a nuc with the entrance at the same place as the tube with the tube still closed. In my case the nuc is on top of an empty deep box to get it the right height. If the entrance to the nuc is the same place, they quickly find the nuc. This gives me several days, if I want it, to clean up the burr, the propolis, rework whatever things were frustrating me, like making a feeder, putting in something to maintain the spacing, a hole to feed pollen, more or less ventilation etc. Then when I'm done, I just put the frames back in the observation hive, remove the nuc and connect everything back up.
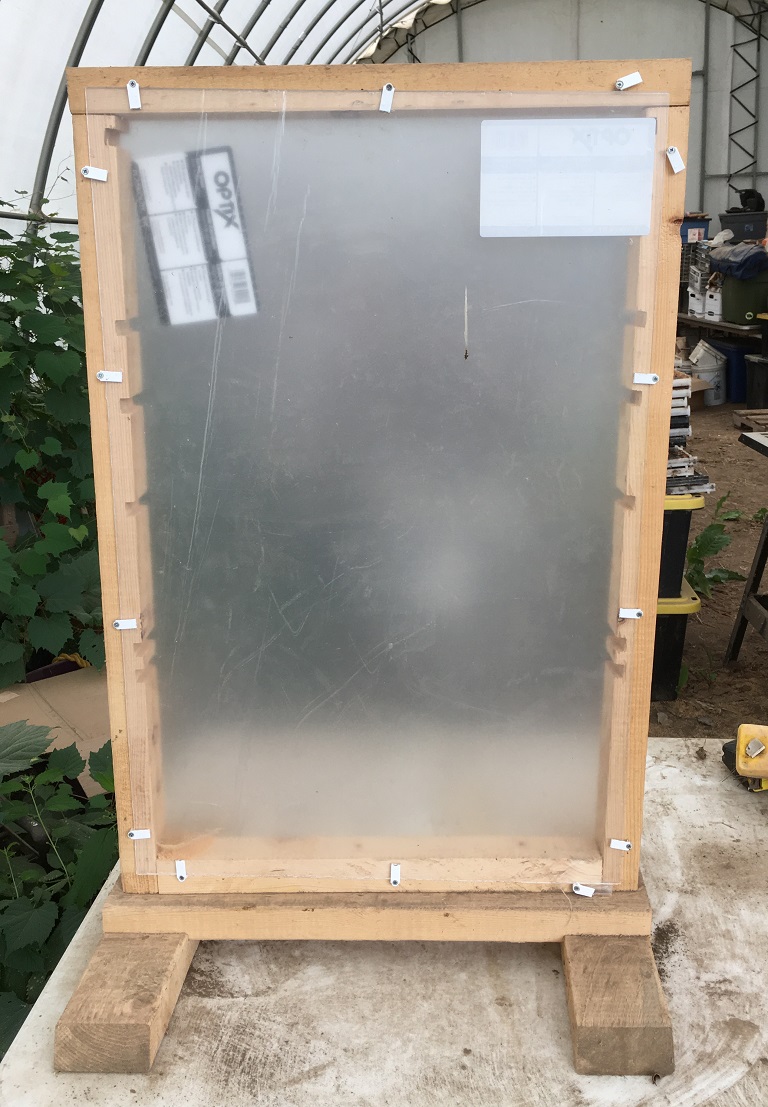
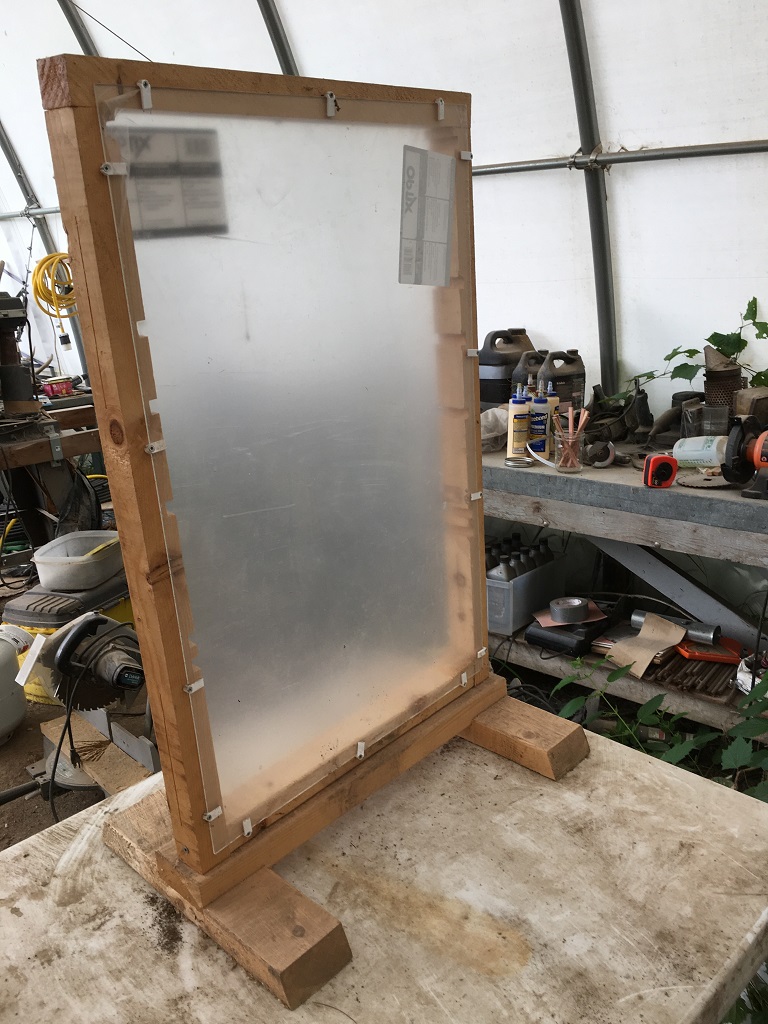
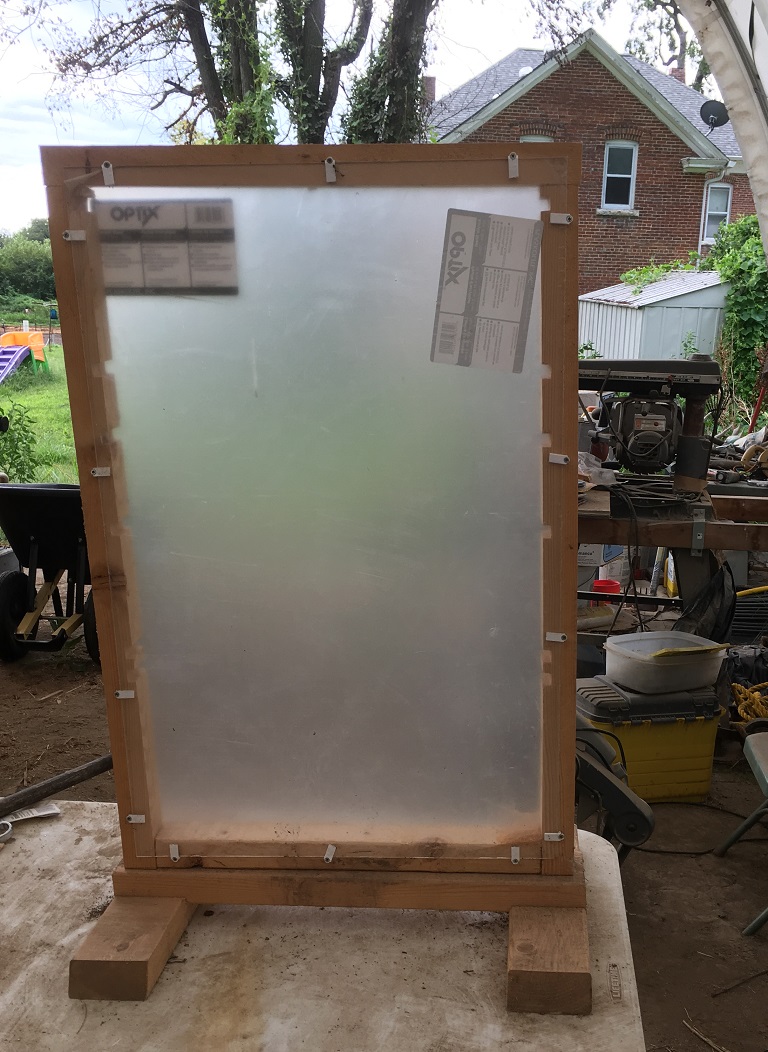
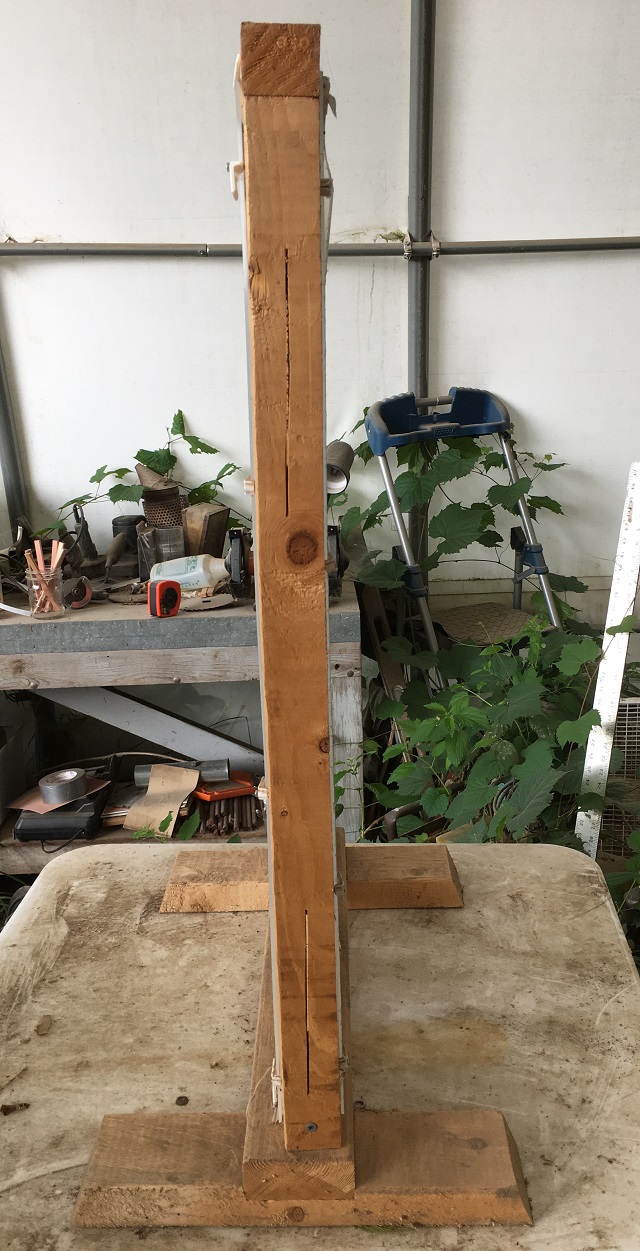
Sample
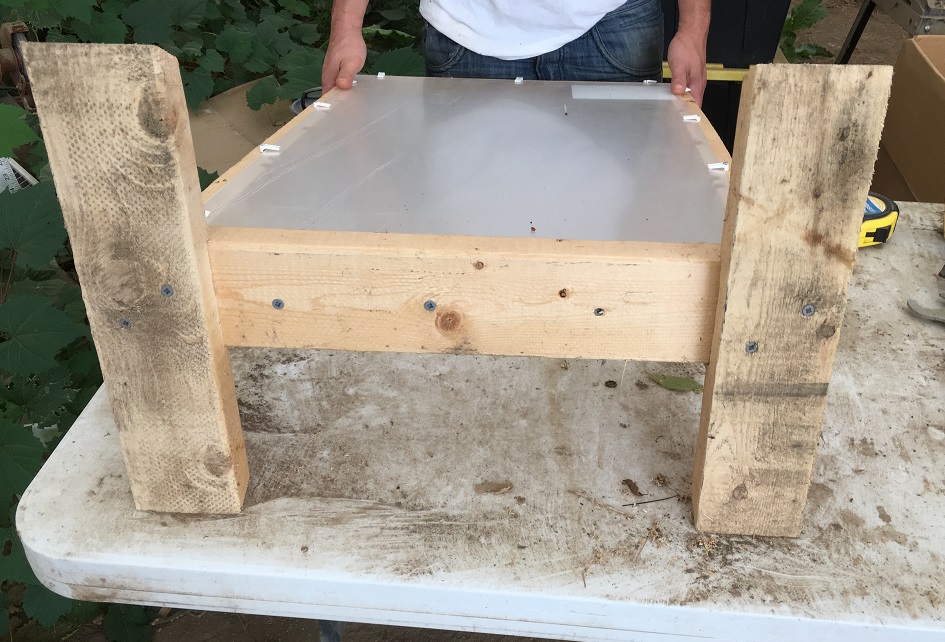
Here are some pictures of a simple homemade observation hive. The side and top rails are cut 1 3/4" wide and screwed together with deck screws. I spaced the frame rests to use either three deep frames or four medium frames. Ventilation is provided by slits cut with a circular saw. The exit tube could be put wherever is convenent for the tube depending on the height of your window etc. I drilled it and screwed a nylon garden hose fitting in and then a scrap of garden hose could be used to make the tube. If you drill the top and then whittle a funnel shaped hole you can put a 20 oz. soda bottom on top for a feeder. Just drill a few 1/16" or smaller holes in the lid and make sure you get the lid to be flus with the bottom of the top rail. Then you can put #8 or #7 hardware cloth over the hole so the bees cannot escape.
Parts list for above observation hive:
NOTE: nominal measurements are used for things like a 2x4 even though it is really 1 1/2" x 3 1/2". Cuts are listed in actual measurment. This design is made to take either all deep or all medium frames.
1 each base 2x4 21 3/8"
2 each feet 2x4 21 3/8" (you can cut a 45 degree angle on the ends for looks)
1 each bottom 2x4 ripped 1 3/4" wide cut 18 3/8" long
1 each top 2x4 ripped 1 3/4" cut 21 3/8" long
2 each sides 2x4 ripped 1 3/4" cut 30 1/2" long
Dadoes 1/2" tall x 3/8" deep running at right angles horizontally across the 1 3/4" face, measuring from the bottom at:
o 9 1/2" (running to 10")
o 10 5/8" (running to 11 1/8")
o 16 3/8" (running to 17 7/8")
o 20 1/4" (running to 20 3/4")
o 23 1/8" (running to 23 5/8")
o 29 3/4" (running the rest of the way to the top for 3/4" dado or if you can do it without breaking it could be 1/2" wide like the rest running to 28 3/4")
2 each plexiglass (or other equivalent) 19 7/8" x 30 1/2" x 1/8"
14 each 3" deck screws
4 each 1 1/2" deck screws
30 each, mirror clips for 1/8" glass.
A piece of 3/4" flexible tubing of some kind long enough to get out the window.
The window typically needs two one by fours that fit the width of the sash with a 1" hole in each that line up with each other (see above pictures of tube going out window).
A 15/16" or 7/8" bit available to drill the hole for the entrance fitting. Adjust height based on an estimate of the window height.
Need a 1 1/16" or 1 1/8" bit to drill the hole for the feeder. Use a 20 oz soda bottle with 1/16" or smaller holes drilled in the cap.
Michael Bush
![]()
Copyright 2006 by Michael Bush